java
zk
It was 2008 and I needed a wiki editor for Elephant-Wiki syntax. The JavaScript source code can be located here editor.txt. For those interested, there is a wiki-bar, coded into a JSP file, which was sensible of caret position as to interact with the user. The code, conveniently renamed to TXT, is here wikiBar.txt
Was quite an effort and never since I have been able to find time to improve it.
Turning to ZK7
Early this year, 2015, BrightSide migrated from ZK6 to ZK7. As usual, guys at Potix had made a great work. ZK7 is fast, slim and a good looking piece of software. Could it be the moment to give a close review to Elephant-Wiki editor?
First requirements
Before trying to write an editor, you have to make sure you'll have what it needs to start with.
- Caret position
- Editor content's value
- Ability to change this content
You might find this list really short for what I'm pretending to do. What about the events, moving data from client to server and so on? Here is where ZK makes difference. I'm not worried at all. 
Caret position
Let's use a simple Textbox for our editor. By default, Textbox does not inform of where the caret is. Thus, we are going to use a trick that was first pointed at ZK forums. Transform a JavaScript event into a ZK event and pass through selection values. That is, selection start and selection end. When both values are the same, there is the caret position. When values differ, then they point to selected text.
wikibox.setWidgetListener("onBlur",
	"zAu.send(new zk.Event(this,"onCaret",zk(this.$n()).getSelectionRange()+"",{toServer:true}));");
This example uses the onBlur event to send an onCaret to ZK Textbox component. The event's data is the selection range. The string has this format "selectionStart,selectionEnd", for example "0,0".
On the server side, we need a listener for the onCaret event.
@Listen("onCaret = *")
public void onCaret(Event event) {
  String v[] = ((String) event.getData()).split(",");
  selectionStart = Integer.valueOf(v[0]);
  selectionEnd = Integer.valueOf(v[1]);
}
The example uses two variables to store selection range for future uses.
Dealing with editor's value
Textbox component has methods that will make things really easy. To ensure the example interesting we'll suppose the user has clicked on the Bold button and wiki syntax for bold text is to surround the value with double asterisk. The example uses wikibox variable as the Textbox component.
@Listen("onClick = #bold")
public void onBold() {
  wikibox.setSelectedText(selectionStart, selectionStart, "**", false);
  selectionStart += "**".length();
  selectionEnd += "**".length();
  wikibox.setSelectedText(selectionEnd, selectionEnd, "**", false);
  wikibox.setSelectionRange(selectionStart, selectionStart);
  wikibox.setFocus(true);
  Events.postEvent(new InputEvent("onChange", this, wikibox.getValue(), null));
}
If there is no text selected, the text "****" will be inserted, with caret positioned exactly in the middle, as to start typing. If some text is selected, the result will be this text surrounded by double asterisk, as in "**bold text**".
Looking at the code, line by line, the setSelectedText method, inserts "**" at selection range's start. Then increases variables so they point to the same location at text. The next setSelectedText inserts "**" at selection range's end. If there was no text selected, then the four asterisk will stay together, otherwise will surround the selection. Calling setSelectionRange method ensures the caret position will be exactly after the first two asterisk. The method setFocus, as it reads, put focus on the editor. Last line posts an onChange event, to inform composer that something in editor has changed.
Let's write the component
In order to give an appearance to our editor we need some zul code and wrap the above examples into a class. We start with the zul code at file wikiInput.zul.
<zk>
  <menubar>
    <menuitem id="bold" iconSclass="z-icon-bold"/>
  </menubar>
  <textbox id="wikibox" multiline="true" tabbable="true" style="-moz-tab-size:4;-o-tab-size:4;tab-size:4;width:100%;height:100%;"/>
</zk>
The code is quite simple. The reason why I prefer a menubar instead of a toolbar will be more evident when you see the real-world example. For now, it makes no difference what the bold element is. The important things to remember are the id attributes, which are wired to ZK components in the Java class at server-side.
See now the Java class WikiEditor.
public class WikiEditor extends Div implements IdSpace {

  private int selectionStart, selectionEnd;

  @Wire private Textbox wikibox;

  public WikiEditor() {
    Executions.createComponents("/WEB-INF/_zul/comps/editor/wikiInput.zul", this, null);
    Selectors.wireComponents(this, this, false);
    Selectors.wireEventListeners(this, this);
    wikibox.setWidgetListener("onBlur",
		"zAu.send(new zk.Event(this,"onCaret",zk(this.$n()).getSelectionRange()+"",{toServer:true}));");

    wikibox.addEventListener(Events.ON_CHANGE, new EventListener() {
      @Override
      public void onEvent(InputEvent event) throws Exception {
        Events.postEvent(WikiEditor.this, event);
      }
    });
  }

  @Listen("onClick = #bold")
  public void onBold() {
    wikibox.setSelectedText(selectionStart, selectionStart, "**", false);
    selectionStart += "**".length();
    selectionEnd += "**".length();
    wikibox.setSelectedText(selectionEnd, selectionEnd, "**", false);
    wikibox.setSelectionRange(selectionStart, selectionStart);
    wikibox.setFocus(true);
    Events.postEvent(new InputEvent("onChange", this, wikibox.getValue(), null));
  }
}
The magic of making Java class aware of zul code is performed in the first three lines of the constructor. Notice that we indicate where to find the zul file in the createComponents method.
Using the component in zul pages
Now you can put the component in your zul pages like this, changing the package org.turro for this where you put the class.
<div width="100%" height="100%" use="org.turro.WikiEditor"/>
Real-world component
As promised, here is the real-world zul page.
<zk>
  <style>
    .font14px * {
      font-size: 14px;
    }
    .fontBold * {
      font-weight: bold;
    }
  </style>
  <menubar sclass="font14px">
    <menuitem id="header1" label="H1" class="fontBold"/>
    <menuitem id="header2" label="H2" class="fontBold"/>
    <menuitem id="header3" label="H3" class="fontBold"/>
    <menuitem id="header4" label="H4" class="fontBold"/>

    <menuitem id="bold" iconSclass="z-icon-bold"/>
    <menuitem id="italic" iconSclass="z-icon-italic"/>
    <menuitem id="regular" iconSclass="z-icon-text-width"/>

    <menuitem id="alignleft" iconSclass="z-icon-align-left"/>
    <menuitem id="aligncenter" iconSclass="z-icon-align-center"/>
    <menuitem id="alignright" iconSclass="z-icon-align-right"/>
    <menuitem id="alignjustify" iconSclass="z-icon-align-justify"/>
    <menuitem id="floatleft" iconSclass="z-icon-chevron-left"/>
    <menuitem id="floatright" iconSclass="z-icon-chevron-right"/>

    <menuitem id="ullist" iconSclass="z-icon-list-ul"/>
    <menuitem id="ollist" iconSclass="z-icon-list-ol"/>

    <menu iconSclass="z-icon-tint">
      <menupopup>
        <menu id="color" content="#color=#333333" label="${el_label['wbar.color']}"/>
        <menu id="background" content="#color=#ffffff" label="${el_label['wbar.background']}"/>
      </menupopup>
    </menu>
    <menu iconSclass="z-icon-table">
      <menupopup>
        <menuitem id="thl" label="${el_label['wbar.newheader']}: ${el_label['wbar.left']}"/>
        <menuitem id="thr" label="${el_label['wbar.newheader']}: ${el_label['wbar.right']}"/>
        <menuitem id="trl" label="${el_label['wbar.newrow']}: ${el_label['wbar.left']}"/>
        <menuitem id="trr" label="${el_label['wbar.newrow']}: ${el_label['wbar.right']}"/>
        <menuitem id="tcl" label="${el_label['wbar.newcolumn']}: ${el_label['wbar.left']}"/>
        <menuitem id="tcr" label="${el_label['wbar.newcolumn']}: ${el_label['wbar.right']}"/>
        <menuitem id="tet" label="${el_label['wbar.endtable']}"/>
      </menupopup>
    </menu>
    <menu iconSclass="z-icon-code">
      <menupopup>
        <menuitem id="block" label="${el_label['wbar.createblock']}"/>
        <menuitem id="span" label="${el_label['wbar.createspan']}"/>
        <menuitem id="note" label="${el_label['wbar.createnote']}"/>

        <menuitem id="startcolumn" label="${el_label['wbar.addcolumn']}"/>
        <menuitem id="endcolumns" label="${el_label['wbar.endcolumns']}"/>

        <menuitem id="tabulator" label="${el_label['wbar.createtabulator']}"/>
        <menuitem id="blind" label="${el_label['wbar.createblind']}"/>

        <menu label="Wiki syntax">
          <menupopup>
            <menuitem id="startwiki" label="${el_label.lStart}"/>
            <menuitem id="stopwiki" label="${el_label.lStop}"/>
          </menupopup>
        </menu>
        <menu label="Java syntax">
          <menupopup>
            <menuitem id="startjava" label="${el_label.lStart}"/>
            <menuitem id="stopjava" label="${el_label.lStop}"/>
          </menupopup>
        </menu>
        <menu label="XML syntax">
          <menupopup>
            <menuitem id="startxml" label="${el_label.lStart}"/>
            <menuitem id="stopxml" label="${el_label.lStop}"/>
          </menupopup>
        </menu>
      </menupopup>
    </menu>
    <menuitem id="eraser" iconSclass="z-icon-eraser"/>

    <menuitem id="image" iconSclass="z-icon-picture-o"/>
    <menuitem id="link" iconSclass="z-icon-link"/>

    <menuitem id="preview" iconSclass="z-icon-eye"/>
  </menubar>
  <textbox id="wikibox" multiline="true" tabbable="true" style="-moz-tab-size:4;-o-tab-size:4;tab-size:4;width:100%;height:100%;"/>
</zk>
Java source code (update 26/04/2015)
WikiEditor.java
WikiElement.java
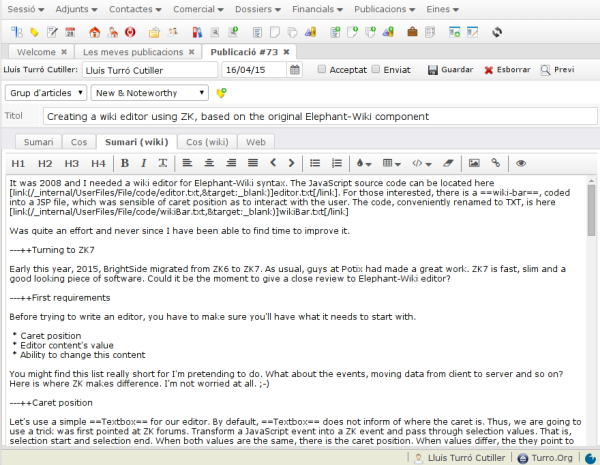
And finally, the editor while writing this blog.